# CORS
# Principle Analysis
# What is CORS
CORS is a W3C standard mechanism (opens new window) based on HTTP headers, with the full name of "Cross-Origin Resource Sharing". This mechanism uses additional HTTP response headers to inform the browser whether a page is allowed to access resources from servers with different origins, overcoming the limitation of AJAX which can only use the same origin, and enabling cross-origin access to resources.
For more information about CORS, please refer to the MDN document (opens new window).
# Same-Origin Policy
The Same-Origin Policy is an important security mechanism used to isolate potentially malicious files and reduce attacks. It limits how a page or script from one origin can interact with resources from another origin. For example, if a page uses AJAX to send a request to a URL from a different origin, the browser will detect that the request is from a different origin (i.e. cross-origin) and blocks the request, and then output the error message to the console.
So, what is the same-origin? In short, having the same protocol, IP/domain name, and port can be considered the same-origin. If any of these are different, it is not the same-origin. Some examples are given in the table below:
| URLs | Result | Reason |
|---|---|---|
http://www.company.com/https://www.company.com/ | Not the Same-Origin | The protocol is different |
http://www.company.com/http://www.company.net/ | Not the Same-Origin | The domain name is different |
http://www.company.com/http://blog.company.com/ | Not the Same-Origin | The domain name is different |
http://www.company.com/http://www.company.com:8080/ | Not the Same-Origin | The port is different (The default port for http:// is 80) |
http://www.company.com/http://www.company.com/blog.html | Same-Origin | Only the path is different |
http://www.company.com/blog/index.htmlhttp://www.company.com/blog.html | Same-Origin | Only the path is different |
http://192.168.0.1/http://192.168.1.1 | Not the Same-Origin | The IP address is different |
# Two kinds of CORS Requests
Browsers divide CORS requests into two categories: simple requests and non-simple requests.
A request is a simple request as long as it meets the following two conditions simultaneously:
- The request method is one of the three methods:
HEAD,GET,POST. - The header information of HTTP does not exceed the following fields:
AcceptAccept-LanguageContent-LanguageLast-Event-IDContent-Typeis one of the following:application/x-www-form-urlencoded,multipart/form-data,text/plain.
Browsers handle these two kinds of requests differently.
# Simple Requests
For simple requests, the browser directly sends a CORS request and adds an Origin field in the request header.
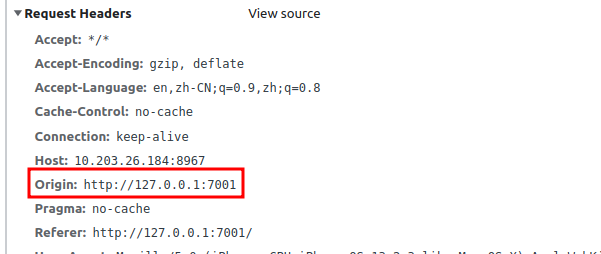
The Origin field indicates which origin (protocol, domain, port) the request comes from. The server can set the Access-Control-Allow-Origin field based on this value to tell the browser whether to respond to this request.
# Non-Simple Requests
Non-simple requests are different from simple requests. When the browser detects a non-simple request, it will automatically send an OPTIONS request first, which is called a preflight request. The purpose of the preflight request is to ask the server if cross-origin requests are allowed, which can avoid additional calculation logic.
After receiving the response from the preflight request, the browser will determine whether to continue sending the second request based on the related fields such as Access-Control-Allow-Origin and Access-Control-Allow-Methods in the response header.
# Several Typical Cross-Origin Errors
The response header does not contain
Access-Control-Allow-Origin:Access to fetch at 'http://127.0.0.1:8967/1.pdf' from origin 'http://127.0.0.1:7001' has been blocked by CORS policy: No 'Access-Control-Allow-Origin' header is present on the requested resource. If an opaque response serves your needs, set the request's mode to 'no-cors' to fetch the resource with CORS disabled.Access-Control-Allow-Originformat error:Access to fetch at '<The target origin of AJAX request: for example: http://192.168.0.1:8080>' from origin 'http://127.0.0.1:7001' has been blocked by CORS policy: The 'Access-Control-Allow-Origin' header contains the invalid value '192.168.0.1' for example. Have the server send the header with a valid value, or, if an opaque response serves your needs, set the request's mode to 'no-cors' to fetch the resource with CORS disabled.
Access-Control-Allow-Origindoes not match:Access to fetch at 'http://127.0.0.1:8967/1.pdf' from origin 'http://127.0.0.1:7001' has been blocked by CORS policy: Response to preflight request doesn't pass access control check: The 'Access-Control-Allow-Origin' header has a value '<Access-Control-Allow-Origin response header content, for example:http://127.0.0.1:9999>' that is not equal to the supplied origin. Have the server send the header with a valid value, or, if an opaque response serves your needs, set the request's mode to 'no-cors' to fetch the resource with CORS disabled.Access-Control-Allow-Headersis not set:Access to fetch at 'http://127.0.0.1:8967/1.pdf' from origin 'http://127.0.0.1:7001' has been blocked by CORS policy: Request header field range is not allowed by Access-Control-Allow-Headers in preflight response
# CORS Solutions
There are two ways to solve CORS. One is to use a proxy server to avoid cross-origin issues, and the other is to configure CORS rules.
# Using a proxy server
A proxy server is an intermediary server between the client and target server, which can be used to request third-party URL resources. Since the request is initiated by the proxy server, the browser does not have CORS problems. We can set up a proxy server ourselves or use a third-party proxy server. Here we introduce the methods of configuring a proxy server using nginx and node.js. These two methods implement the same function, which is to proxy requests for /prefix/* to the third-party server http://third_party.file.server, while removing the /prefix prefix from the original path. For example, the URL http://location:3000/prefix/path/to/some.pdf will be proxied to http://third_party.file.server/path/to/some.pdf.
# Configure a proxy server with Nginx
Nginx is a high-performance web server that can be used as a proxy server. Following is the method of configuring a proxy server in Nginx.
Open the Nginx configuration file (usually located in /etc/nginx/nginx.conf, depending on the server environment), find the corresponding server block, and add the following code:
location ~* ^/prefix/(.*) {
    proxy_pass http://third_party.file.server/$1$is_args$args;
    proxy_redirect off;
}
In the above code, Nginx first constructs the correct file URL path when receiving a request that starts with /prefix in the path, and then proxies the request to the third-party file server.
# Configure a proxy server with Node.js
Take Express, Koa, and NestJS as examples.
Express
Express can use the third-party middleware
http-proxy-middlewareto implement proxying, and with the routing functionality of Express, proxy requests starting with prefix to a third-party file server:const express = require('express'); const { createProxyMiddleware } = require('http-proxy-middleware'); const app = express(); app.use('/prefix', createProxyMiddleware({ target: 'http://third_party.file.server', changeOrigin: true, pathRewrite: { ['^/prefix']: '' } }));This code will replace the
/prefix/in the path when receiving requests starting with/prefix, and forward the request to the target URL. For more usage, please refer to https://www.npmjs.com/package/http-proxy-middleware (opens new window).Koa
Koa needs to use the third-party middleware koa-proxy to implement proxying:
const Koa = require('koa');
const proxy = require('koa-proxy');
const app = new Koa();

app.use(
    proxy('/prefix', {
        host: 'http://third_party.file.server',
        match: /^\/prefix\//,
        map: function(path) {
            return path.replace('/prefix', ''); // Replace the /prefix prefix in the path
        }
    })
)
For more usage, please refer to https://www.npmjs.com/package/koa-proxy (opens new window).
NestJS
Similar to Express, NestJS can use the third-party middleware
http-proxy-middlewareto implement proxying:import { NestFactory } from '@nestjs/core'; import { AppModule } from './app.module'; import { createProxyMiddleware } from 'http-proxy-middleware'; async function bootstrap() { const app = await NestFactory.create(AppModule); // Proxy endpoints app.use('/prefix', createProxyMiddleware({ target: 'http://third_party.file.server', changeOrigin: true, pathRewrite: { [`^/prefix`]: '', } })); await app.listen(3000); } bootstrap();This code has the same effect as the example of Express.
# Configuring CORS
In Foixt PDF SDK for Web, PDFViewer.openPDFByHttpRangeRequest (opens new window) API often encounters cross-domain problems. In order to improve the speed of opening PDF documents and reduce file server bandwidth, this API will send a request with the Range request header to the file server when requesting PDF files. After receiving the response, it needs to calculate the total file size based on the Content-Range response header. Therefore, when configuring CORS, the following three items should be included at least.
Access-Control-Allow-Headers: Range;
Access-Control-Allow-Origin: *; // For security reasons, it is recommended to be the same as the value of the Referer header in the request.

Access-Control-Expose-Headers: Content-Range; // Only the response header keys added here can be obtained by JavaScript to get the values of the response headers.
Below are the configuration methods for several different scenarios.
# Configure CORS with web servers
Configure CORS with Nginx
Add the following node to the nginx.conf file (usually located at
/etc/nginx/nginx.conf):server { listen 8967; server_name 127.0.0.1; charset utf8; location / { root "/path/to/files/directory/"; if ($request_method = OPTIONS) { add_header 'Access-Control-Allow-Headers' 'Range'; add_header 'Access-Control-Allow-Origin' '*'; add_header 'Access-Control-Expose-Headers' 'Content-Range'; return 204; } add_header 'Access-Control-Allow-Headers' 'Range'; add_header 'Access-Control-Allow-Origin' '*'; add_header 'Access-Control-Expose-Headers' 'Content-Range'; } }The above configuration allows all sites to access resources across domains, which is an unsafe but convenient approach. In actual application scenarios, restrictions should be added, such as setting whether to allow cross-domain access based on the origin of the request. The approach is as follows:
Add the $cors variable and use $http_origin to determine if the origin is valid. The following code will allow all subdomains of foxit.com to access resources across domains:
map $http_origin $cors {
    '~*^https?://.*.foxit.com$' 'true';
}
Add the $allow_origin variable. If the value of $cors is 'true', it means that the request is a cross-domain request, and then response the value of
Access-Control-Allow-Origin.map $cors $allow_origin { 'true' $http_origin; }Similarly, you can specify the
Access-Control-Allow-Headersresponse header when making a cross-domain request.map $cors $allow_headers { 'true' 'Range'; }Finally, integrate all the configurations.
map $http_origin $cors {
    '~*^https?://.+.foxit.com$' 'true';
}
map $cors $allow_origin {
    'true' $http_origin;
}
map $cors $allow_headers {
    'true' 'Range';
}
map $cors $allow_expose_headers {
    'true' 'Content-Range'
}
server {
    listen 8967;
    server_name 127.0.0.1;
    charset utf8;
    location / {
        root "/path/to/files/directory/";
        if ($request_method = OPTIONS) {
            add_header 'Access-Control-Allow-Headers' $allow_headers;
            add_header 'Access-Control-Allow-Origin' $allow_origin;
            add_header 'Access-Control-Expose-Headers' $allow_expose_headers;
            return 204;
        }
        add_header 'Access-Control-Allow-Headers' $allow_headers;
        add_header 'Access-Control-Allow-Origin' $allow_origin;
        add_header 'Access-Control-Expose-Headers' $allow_expose_headers;
    }
}
In order to ensure that the modifications are correct, we recommend running
nginx -tto check if there are any errors in the modified configuration. If there are no errors, then runnginx -s reloadto reload the Nginx service.Configure CORS with Tomcat
Following is a simple example of CORS configuration. You can also refer to the official documentation of Tomcat: http://tomcat.apache.org/tomcat-7.0-doc/config/filter.html#CORS_Filter (opens new window).
<filter>
    <filter-name>CorsFilter</filter-name>
    <filter-class>org.apache.catalina.filters.CorsFilter</filter-class>
</filter>
<init-param>
    <param-name>cors.allowed.origins</param-name>
    <param-value>https://*.foxit.org</param-value>
</init-param>
<init-param>
    <param-name>cors.allowed.headers</param-name>
    <param-value>Range</param-value>
</init-param>
<init-param>
    <param-name>cors.exposed.headers</param-name>
    <param-value>Content-Range</param-value>
</init-param>

<filter-mapping>
    <filter-name>CorsFilter</filter-name>
    <url-pattern>/*</url-pattern>
</filter-mapping>
Configure CORS with Apache
In Apache, we can enable CORS by adding the following rules to the
<Directory>,<Location>,<Files>or<VirtualHost>section in the server configuration, which is usually located in httpd.conf or apache.conf:Header set Access-Control-Allow-Origin '*'; Header set Access-Control-Allow-Headers 'Range'; Header set Access-Control-Expose-Headers 'Content-Range';You can also add the following code to the .htaccess file:
<IfModule mod_headers.c>
    Header set Access-Control-Allow-Origin '*';
    Header set Access-Control-Allow-Headers 'Range';
    Header set Access-Control-Expose-Headers 'Content-Range';
</IfModule>
In order to ensure that the modifications are correct, we recommend running
apachectl -tto check if there are any errors in the modified configuration. If there are no errors, then runsudo service apache2.conforapachectl -k gracefulto reload the Apache service.Note: You can also use the
addcommand instead of thesetcommand, but usingaddmay result in the header information being added multiple times. Therefore, the safest approach is to useset.Configure CORS with IIS
The configuration methods for IIS6 and IIS7 versions are different. Please confirm the version you are currently using before configuring.
- IIS6
Open IIS, select the site you need to configure, and right-click to open the property dialog box. Select the 'HTTP Headers' tab, and click the 'Add' button, and then add these response headers:
Access-Control-Allow-Headers: 'Range',Access-Control-Allow-Origin: *,Access-Control-Expose-Headers: Content-Range.- IIS7
Please merge or add the following configuration to your site configuration file (i.e. web.config file. If you do not have this file, you can create a new one.):
<?xml version="1.0" encoding="utf-8"?>
<configuration>
<system.webServer>
<httpProtocol>
    <customHeaders>
    <add name="Access-Control-Allow-Origin" value="*" />
    <add name="Access-Control-Allow-Headers" value="Range" />
    <add name="Access-Control-Expose-Headers" value="Content-Range" />
    </customHeaders>
</httpProtocol>
</system.webServer>
</configuration>
# Configure CORS with cloud storage resources
There are many cloud storage and CDN services in the market, and most of them have their corresponding configuration methods available in their official documentation. Here are just a few examples:
- Alibaba Cloud: https://www.alibabacloud.com/help/en/object-storage-service/latest/configure-cors (opens new window)
- Tencent Cloud: https://www.tencentcloud.com/document/product/436/13318 (opens new window)
- Google Cloud: https://cloud.google.com/storage/docs/using-cors (opens new window)
- Azure Storage: https://learn.microsoft.com/en-us/rest/api/storageservices/cross-origin-resource-sharing--cors--support-for-the-azure-storage-services (opens new window)
- AWS S3: https://docs.aws.amazon.com/AmazonS3/latest/userguide/cors.html (opens new window)
# Configure CORS in server-side frameworks
- Node.js related frameworks
- Express: please refer to express cors middleware (opens new window)
- Koa: please refer to @koa/cors (opens new window)
- NestJS: please refer to CORS|NestJS (opens new window)
- SpringBoot (java) framework:please refer to Enabling Cross Origin Requests for a RESTful Web Service (opens new window)
- Django (python) framework:please refer to django-cors-headers (opens new window)
- Laravel (php) framework:please refer to laravel-cors (opens new window)